
In this post I'll walk you though the basics of this sensor and how I use this sensor in addition to all the default PRTG sensors to monitor my environment.
As I mentioned in my first blog post, I really like the prtgshell PowerShell module that you can download here. In this example, I will explain how to use this PowerShell module just to write a simple value to PRTG through the EXE/Script Advanced Sensor, that's all. In upcoming post, I'll explain how to use the prtgshell PowerShell Module together with VMware / NetApp/ Active Directory/Citrix etc.
The first thing you have to know (and I noticed that a lot of people are confused by this) is that, if you make a PowerShell script to monitor something, the PowerShell script runs on the PRTG Core Server or PRTG Probe server, not on the server that you added as a device in PRTG! When you want to monitor something on another server, you have to create a remote connection within your PowerShell script from the PRTG Probe Server to that server. I'll explain this in more detail in upcoming post.
With that said, let's start with a simple example. In my case, I'm running a PRTG Core Server on a Windows Server 2012 R2 server. First of all, place the prtgshell.psm1 on the PRTG Core Server. Make sure that the prtgshell.psm1 module is placed under a path that is listed in the $env:PSModulePath variable, otherwise you can't import the module wtihout specifying the path.
Next, start the Windows PowerShell ISE to create your first PowerShell script.
Import-module prtgshell
Now we can use the PowerShell module. Let's just create (for the purpose of this demonstration) a variable with a value that we are going to write to PRTG. Let's say that 1024 is the amount of RAM.
$ram = "1024"So, we are expecting the value "1024" in the new sensor in PRTG right? Now, let's use the prtgshell PowerShell module to write this to PRTG.
$XMLOutput = "<prtg>`n"
$XMLOutput += Set-PrtgResult -Channel "Input" -Value $ram
 -Unit "RAM"
$XMLOutput += "</prtg>"
write-host $XMLOutput
If we execute this in PowerShell we get this output.
This is the XML format that PRTG understands, awesome! Now, without going in too much detail, we see that we have one channel called "Amount of RAM" with the value of 1024. This sensor has a custom unit (with means that it displays the value as text). The float "1" means that the value type is "float" (the value has to be a float or an integer). Showchart "0" means that this channel is not displayed in the chart of the sensor. Optionally, you can change this later in the channel settings.
The full script we have so far:
When you go to your PRTG Probe in the web interface, go to your PRTG Probe server and click add sensor. Add the EXE/Script Advanced Sensor to the PRTG Probe server.
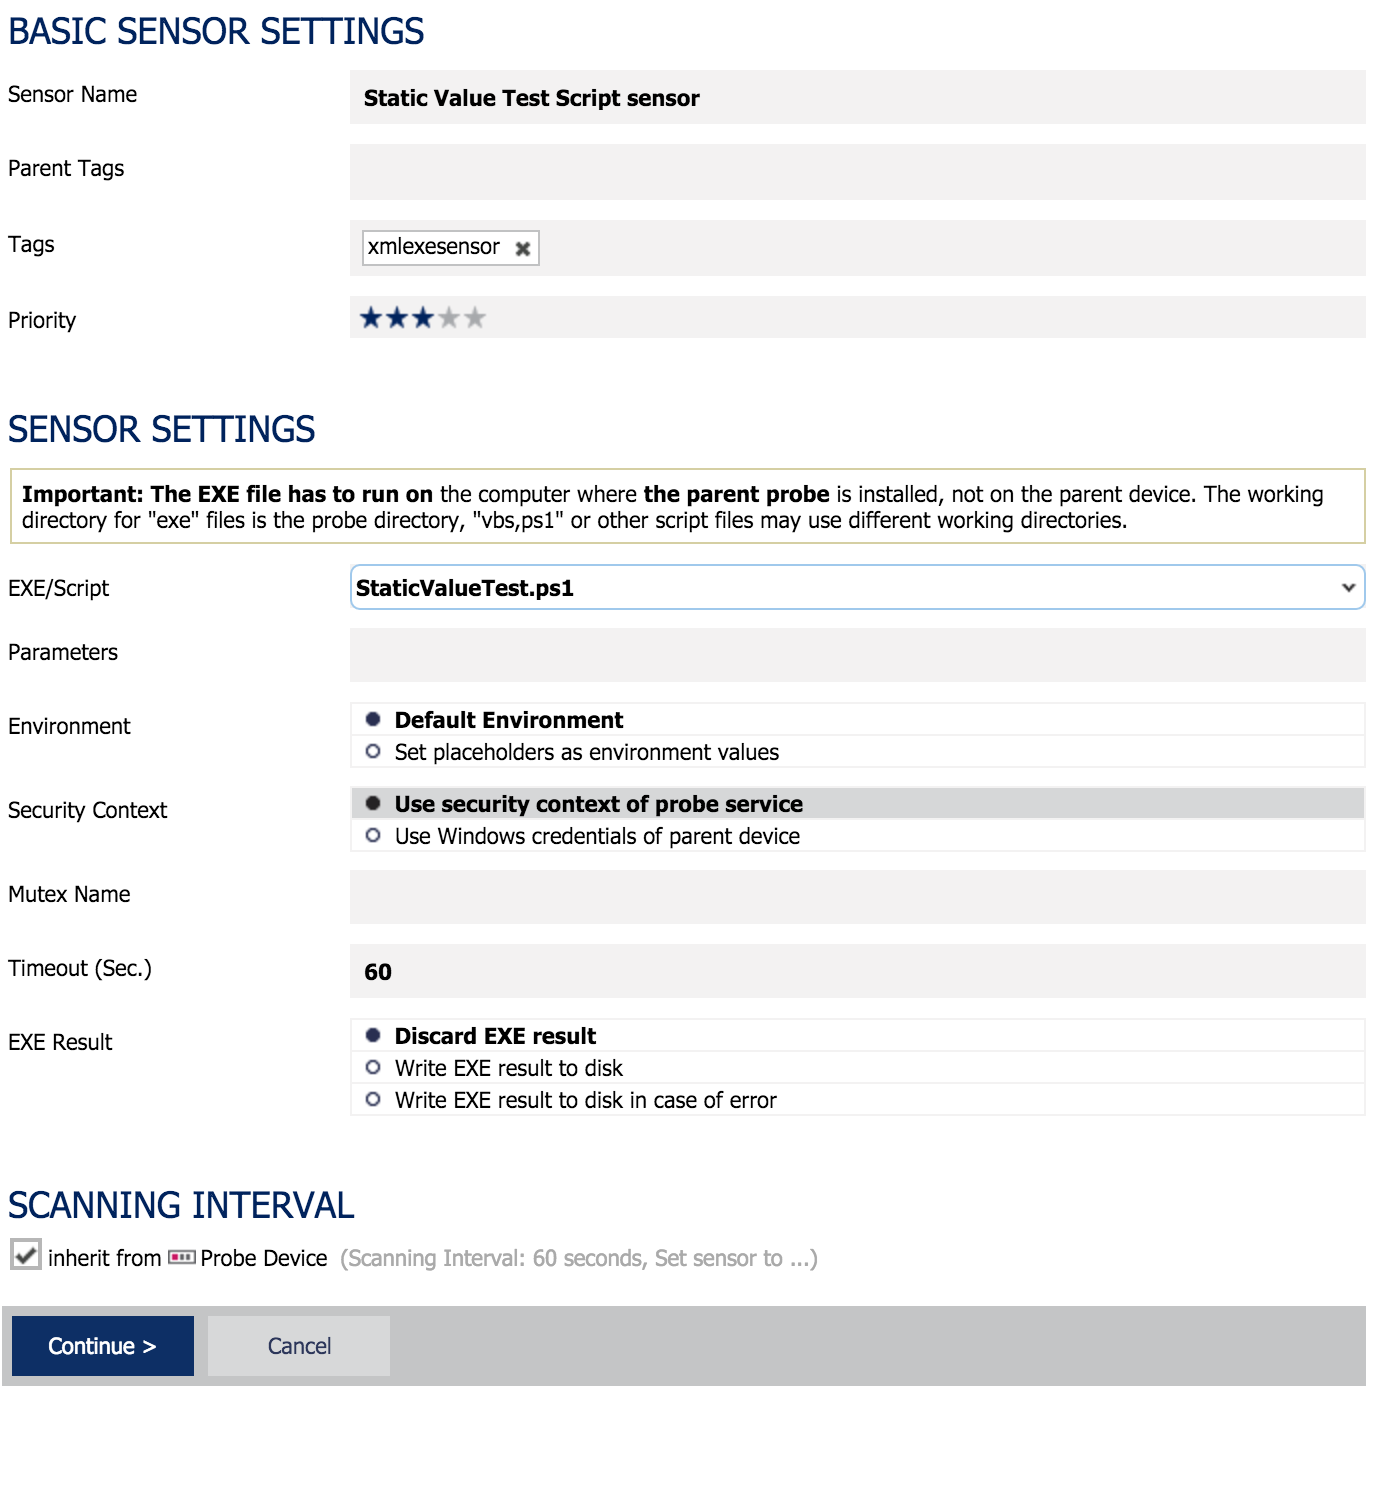
When you added the EXE/Script Advanced Sensor, the following page is shown.


Enter the name of the sensor. I used "Static Value Test Script sensor"
Under the EXE/Script, select the "StaticValueTest.ps1" that you just saved.
Click continue.
If everything is configured as expected, the sensor is green.

<prtg>
<result>
<channel>Amount of RAM</channel>
<value>1000</value>
<unit>custom</unit>
<customunit>RAM</customunit>
<showchart>0</showchart>
</result>
</prtg>
This is the XML format that PRTG understands, awesome! Now, without going in too much detail, we see that we have one channel called "Amount of RAM" with the value of 1024. This sensor has a custom unit (with means that it displays the value as text). The float "1" means that the value type is "float" (the value has to be a float or an integer). Showchart "0" means that this channel is not displayed in the chart of the sensor. Optionally, you can change this later in the channel settings.
The full script we have so far:
Import-Module prtgshell
$input = 1000

XMLOutput = "<prtg>`n"
$XMLOutput += Set-PrtgResult -Channel "Amount of RAM" -Value $input -Unit "RAM"
$XMLOutput += "</prtg>"
write-host $XMLOutput
Save this script as "StaticValueTest.ps1" under the installation folder of your PRTG installation: <PRTG Installation path>\Custom Sensors \EXEXML. (for example: C:\Program Files\PRTG Network Monitor\Custom Sensors\EXEXML). Do not use the Powershell folder for this since this is only used for older PRTG installations.
When you go to your PRTG Probe in the web interface, go to your PRTG Probe server and click add sensor. Add the EXE/Script Advanced Sensor to the PRTG Probe server.
When you added the EXE/Script Advanced Sensor, the following page is shown.

Enter the name of the sensor. I used "Static Value Test Script sensor"
Under the EXE/Script, select the "StaticValueTest.ps1" that you just saved.
Click continue.
If everything is configured as expected, the sensor is green.

Now you added this sensor to the PRTG Probe device in PRTG. Please note that, at this moment, there is no direct connection between the devicename or device DNS name in PRTG and the script that we made. If we add a new device in PRTG and call it "SimpleValueDevice", it will also work. So we can use a device in PRTG as an administrative unit to group sensors together, but we can also use the devices in PRTG to actually gather information from servers with PowerShell.
Since Slots.lv ranked at the prime of our record, let’s a glance at|check out} the short process of making an account with them and claiming the bonus codes. For example, if you receive a $50 deposit bonus with a 10x wagering requirement, you must guess 10 times the bonus quantity to safe the bonus, which would be $500. Red Dog Casino offers more to their gamers besides an adorable doggie mascot, together with a useful welcome bundle worth as much as} a whopping $12,250. If you are be} funding your account with cryptocurrency, use the promo code SLBWB300 for a 300% match a lot as} $1,500. If it is 코인카지노 your first time withdrawing, additionally, you will have to confirm your id or submit other required documentation. Some casinos additionally solely enable withdrawals to the same methodology used for deposits, so certain you|ensure you|be positive to} know the rules of your on line casino.
ReplyDelete